

|
| | |
|
|
How to install glass or porcelain mosaic tile face-mounted on transparent adhesive film .
|
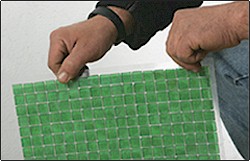
The adhesive on our new clear mosaic film will hold your mosaic tiles together through the production, transportation, and installation processes.With clear mosaic film, setting and installing mosaic tiles is a simple task.
Mosaic film is fully transparent so the installer can easily match grout joints and line up the mosaic.

Always keep the mounted tile in a climate controlled area to avoid exposure to moisture and humidity, which could compromise the strength of the adhesive.
|

Application of Latex-modified Thinset
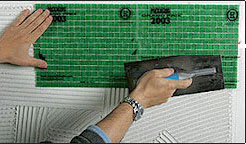
Apply a good quality latex-modified thinset approved for use with glass and/or porcelain mosaic tile. Be sure to use a thinset that is compatible with your substrate and environment (i.e. wet areas or exterior areas).Thinset should be spread using a 3/16"e; v-notched trowel. Apply the thinset to the surface to be tiled with using a back-and-forth scraping motion in order to maintain good contact between the thinset and your surface. Cover only as much area as you can work within 10-15 minutes, or as long as the thinset remains tacky. The three best brands we have found are Custom Building Products' Flex-Bond, Tec's Superflex latex-modified thinset, TA-392 or TA392 and Mapei's Kerabond mixed with Keralastic. NOTE: Ceramic Tile Mastic WILL NOT WORK with glass tile. BACK-BUTTERING: Next, spread a thin layer of thinset on the exposed (patterned) side of the glass mosaic tile sheet with the straight edge of your trowel. This back-buttering step is best used for all glass mosaic tile, but is essential in the use of transparent tile, in order to hide the trowel lines on the substrate which might otherwise show through.Back buttering also assures complete adhesion between tile and substrate. NOTE: When back-buttering, it is common for thinset to push through the grout joint and rise above the surface of the tile once the sheet is applied to the wall. For this reason, many installers "e;set in color"e;, or use the same installation product as both mortar and grout. Check with the manufacturer of the thinset product you choose in order to verify that the product is suitable for this use. If you choose not to set in color, you can remove excess grout as described below.

SETTING:Set your sheets with the clear mosaic film FACING OUT. Sheets should be placed onto the newly trowelled thinset on your surface immediately. DO NOT delay this step, or your thinset will dry and the tiles will not fully adhere to the surface.LEVELLING:Square the sheet and apply to your surface,then "e;beat in"e; gently with a block of wood and hammer or a grouting float to assure 100% adhesion and level surface. Beating in across the sheet joints as you install will better assure a level field across the entire area. Properly beating in and levelling will prevent air bubbles from being trapped between thinset and tile.

ALIGNMENT:Align each sheet carefully as it is installed to create uniform grout joints from sheet to sheet. IMPORTANT: Align sheets as you move across the field. Do not wait until all of the sheets are installed to begin straightening joints, or the thinset will begin to dry before all of the sheets are aligned.Repeat these steps until all sheets have been installed.

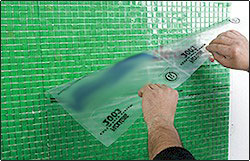
REMOVING THE MOSAIC FILM:Wait 24 hours for the thinset to cure and remove the film in a diagonal direction, keeping it flat against the surface of the mosaic. The film peels off easily and it leaves no trace of adhesive residue. You will only see the smooth surface of the newly installed tiles.
GROUT PREPARATION:Once the thinset is cured (24-48 hours after initial application), and the tile will be ready for grouting.If necessary, use a utility knife to carefully remove any excess thinset from the joints. GROUT APPLICATION:With a hard rubber float, spread your prepared grout at a 45 degree angle (on a diagonal)across the tile field. After grouting the area, wait 20 minutes before you start to clean the excess.
GROUT CLEAN-UP:Wipe excess grout off, first with a dry cloth, such as cheesecloth or any other lint-free cloth to remove excess grout on the tile surface. Follow up with a sponge and warm water. The less water you use, the better, as too much water can weaken the grout before it sets. Once the tile looks clean, go back over it with fresh water and a damp sponge to reduce surface film. Allow tile surfaces to dry for 15 minutes, then buff with a soft cloth until shiny. If you wait longer to clean and buff the tile, the resulting grout haze will become difficult to remove.
CLEANING & SEALING:As soon as the installation is completely dry you can safely clean any remaining grout haze or residue with a tile cleaner and scrubbing pad. Once tile is cleaned and dry, seal grout with a good quality sealant to prevent mildew and staining.
NOTICE: This information is offered as a guideline. Mosaic Tile Supplies, Inc. is not responsible for any application performed in a manner inconsistent with these instructions. For best results, hire a professional tile installer experienced in the application of face-mounted glass mosaic tile.Copyright 2004 Mosaic Tile Supplies, Inc.
|
|
| |
| | |
|
|